
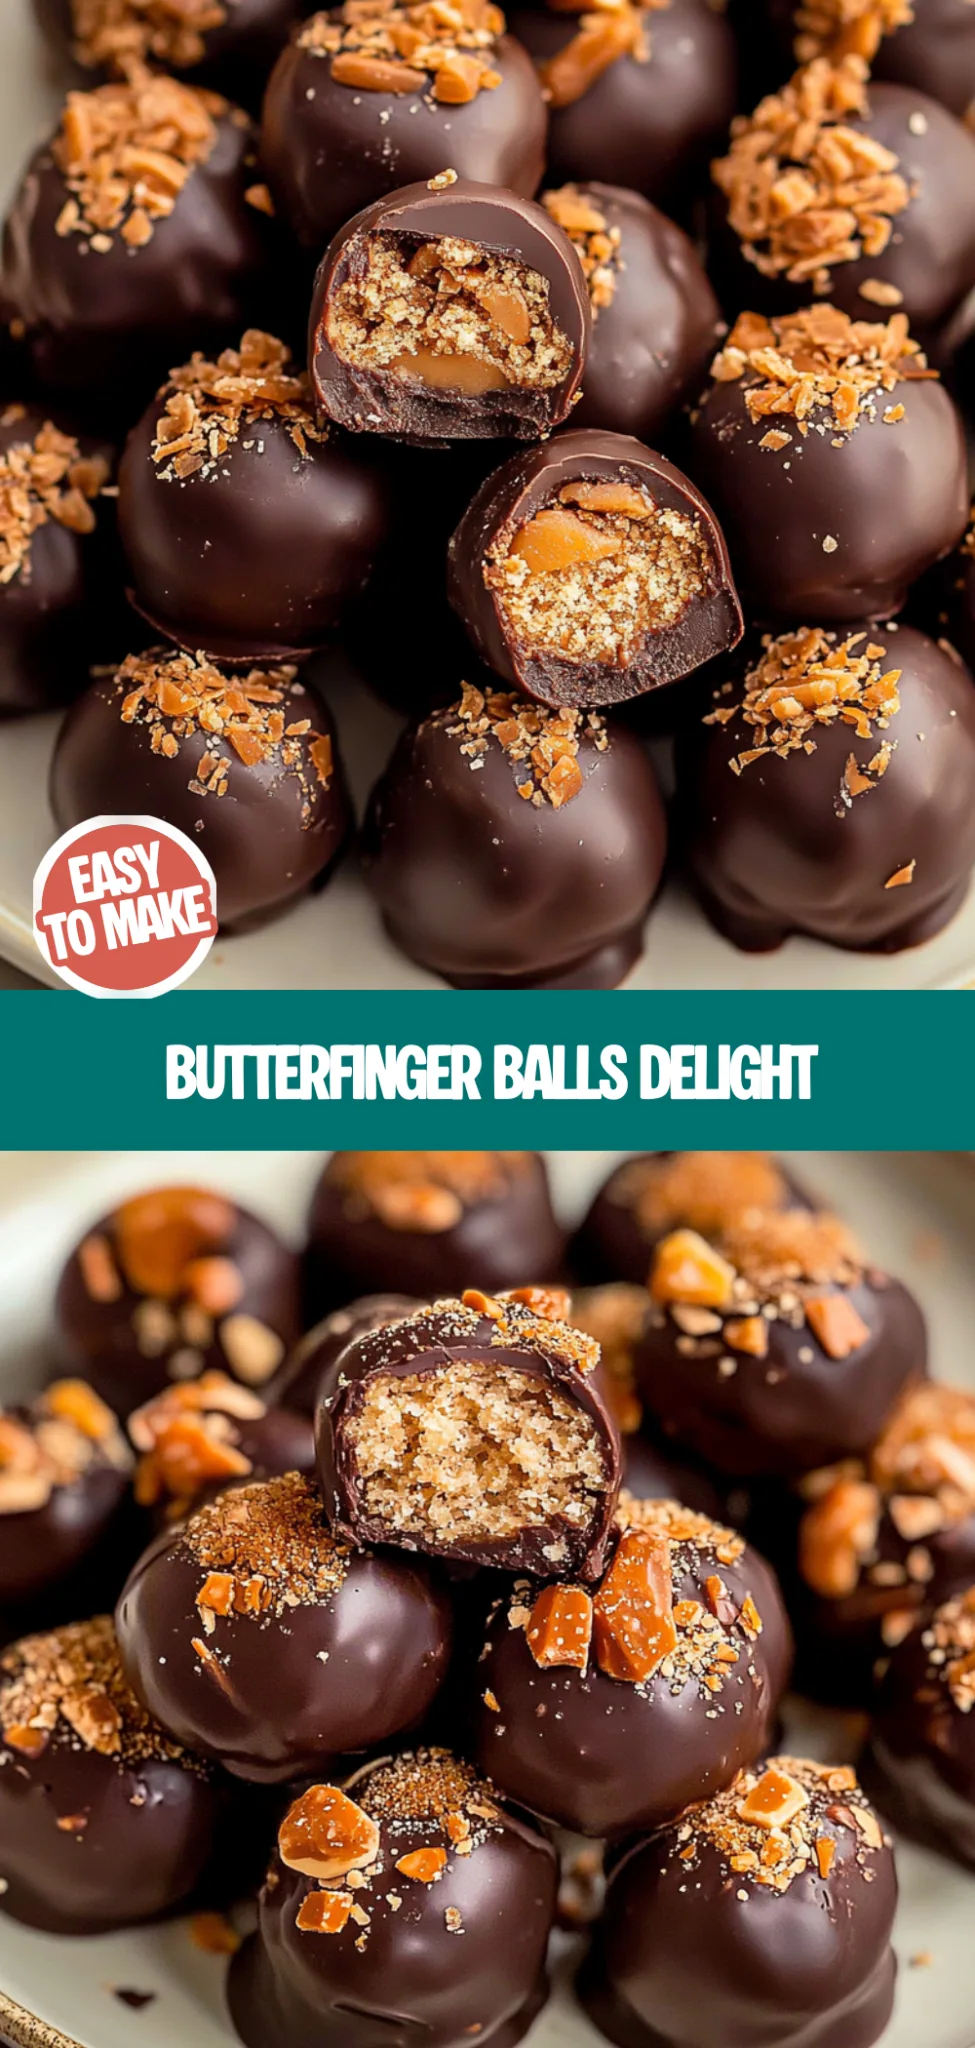
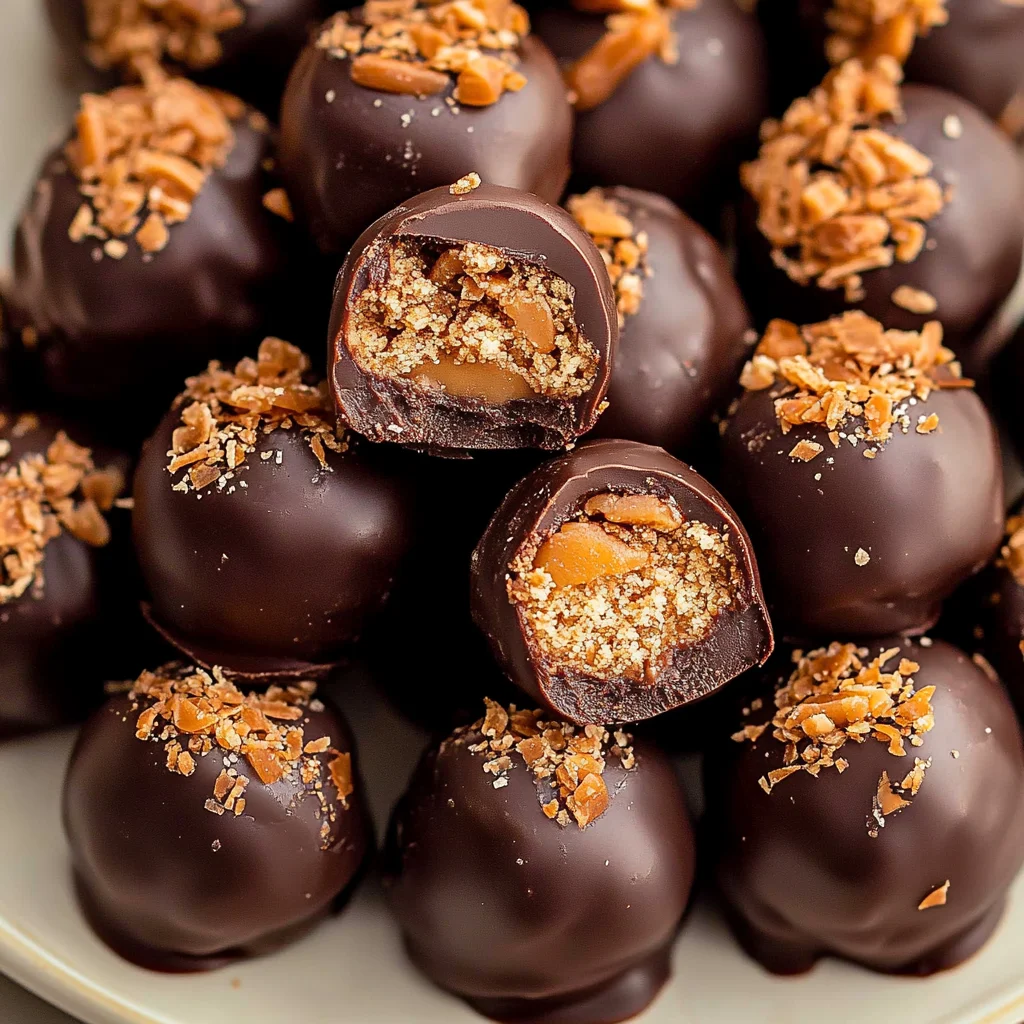
Butterfinger Balls: Irresistibly Gooey Treats You’ll Love
Imagine biting into a warm, gooey slice of chocolate lava cake, where the rich, velvety chocolate oozes out like a sweet surprise, tantalizing your taste buds with each decadent mouthful. The aroma wafts through the air, wrapping you in a cozy embrace that instantly transports you to a moment of pure bliss—perhaps a birthday celebration or a rainy afternoon spent with friends.
This indulgent dessert is not just about the chocolate; it’s about the memories it creates and the laughs shared over forkfuls of molten goodness. Whether it’s served at an elegant dinner party or enjoyed as a guilty pleasure on a quiet night in, this cake promises to elevate any occasion, leaving you craving more and eagerly anticipating that first heavenly bite.
Why are Butterfinger Balls so irresistible?
Decadent and delightful, these no-bake treats combine the rich flavor of Butterfingers with creamy peanut butter, ensuring each bite is a sweet explosion.
- Quick to make: With just a few ingredients, you can whip them up in no time!
- Versatile: Perfect for parties, holiday gatherings, or a simple dessert fix.
- Crowd pleaser: Everyone loves the crunchy texture and indulgent taste!
- Easy storage: Make ahead and store them in the fridge for a ready-to-enjoy snack!
Butterfinger Balls Ingredients
For the Balls:
- 1 cup creamy peanut butter – Choose a natural brand for a rich, authentic flavor and avoid added sugars.
- 1/2 cup unsalted butter (softened) – This makes the mixture smooth; use margarine if you need a dairy-free alternative.
- 2 cups powdered sugar – Sweetens and gives that classic Butterfinger taste; sift if lumpy for a smoother texture.
- 1 1/2 cups crushed Butterfinger candy bars – The star ingredient for that distinctive crunch; you can substitute with any similar chocolate bar.
For the Coating:
- 12 oz milk chocolate chips – Melts beautifully for coating; dark chocolate is a great option for those who prefer less sweetness.
- 1 tablespoon coconut oil – Helps to create a smooth melt; feel free to omit if you prefer a thicker coating.
These delightful Butterfinger Balls will surely become a family favorite, perfect for parties or just as a sweet treat at home!
How to Make Butterfinger Balls
1. Crush the Butterfinger bars into fine crumbs using a food processor or by placing them in a zip-top bag and smashing with a rolling pin. Aim for a sandy texture that holds together well.
2. Mix the crushed Butterfinger with cream cheese in a large bowl until fully combined. This should form a thick, sticky mixture that you can easily shape into balls.
3. Scoop out tablespoon-sized portions of the mixture and roll them into smooth balls using your hands. Aim for uniform sizes for even coating later; place them on a parchment-lined baking sheet.
4. Chill the formed balls in the refrigerator for at least 30 minutes, allowing them to firm up and make them easier to dip in chocolate.
5. Melt chocolate chips in a microwave-safe bowl, heating in 30-second intervals until smooth and glossy. Stir between intervals to avoid burning the chocolate.
6. Dip each chilled Butterfinger ball into the melted chocolate, ensuring it’s fully coated. Use a fork to lift and let excess chocolate drip off before returning them to the baking sheet.
7. Cool the chocolate-coated balls in the fridge for about 15 minutes until set and hardened, creating that irresistible shell around each sweet morsel.
Optional: Drizzle extra melted chocolate on top for an elegant finish.
Exact quantities are listed in the recipe card below.
Tips for the Best Butterfinger Balls
- Chill the Dough: Allow your mixture to chill for at least 30 minutes. This makes it easier to shape and prevents melting during coating.
- Use Quality Chocolate: Opt for high-quality chocolate for dipping. Better chocolate enhances the flavor of your Butterfinger Balls and gives them a beautiful sheen.
- Avoid Overmixing: Mix just until combined. Overmixing can lead to a crumbly texture, affecting the overall consistency of your Butterfinger Balls.
- Roll Evenly: Roll uniform balls for consistent cooking and a polished look. This helps ensure every bite is as delightful as the last.
- Let Them Set: After coating, let your Butterfinger Balls set in the fridge for at least an hour. This helps the chocolate harden perfectly, making them easier to handle.
How to Store and Freeze Butterfinger Balls
Room Temperature: Enjoy your Butterfinger Balls at room temperature for up to 3 days. Just keep them in an airtight container to maintain their delightful texture.
Fridge: For longer freshness, store your Butterfinger Balls in the refrigerator for up to 1 week. Place them in a sealed container to prevent any moisture from affecting their crunch.
Freezer: If you want to save some for later, freeze your Butterfinger Balls for up to 3 months. Wrap each ball individually in plastic wrap, then place them in a freezer-safe bag.
Reheating: To enjoy your frozen Butterfinger Balls, simply thaw them in the fridge overnight or let them sit at room temperature for about 30 minutes before indulging.
Butterfinger Balls Customizations
Feel free to unleash your creativity and personalize these delightful treats to make them truly your own!
- Nut-Free: Substitute peanut butter with sunflower seed butter for a deliciously nut-free treat, perfect for school lunches. Your kids won’t even notice the difference!
- Dairy-Free: Use coconut cream instead of butter to create a rich, dairy-free version that still delivers on flavor. This twist adds a tropical flair that will transport you straight to paradise.
- Chocolate Drizzle: Enhance the decadence by adding a drizzle of dark chocolate on top. The contrast of flavors elevates every bite into a gourmet experience.
- Spicy Kick: Mix in a pinch of cayenne pepper for an unexpected heat that pairs wonderfully with the sweetness. It’s a surprising twist that will leave your guests wanting more.
- Crunchy Add-in: Fold in crushed pretzels or rice cereal for an added crunch. This texture variation brings an exciting element to each mouthful, making them even more addictive.
- Flavor Infusion: Experiment with flavored extracts like almond or vanilla to create unique taste profiles. Just a drop can transform the whole experience into something magical.
- Mini Versions: Roll smaller balls for bite-sized treats, perfect for parties or snacking. These mini delights are just as satisfying but allow everyone to enjoy guilt-free indulgence.
Make Ahead Options
If you’re looking to save time without sacrificing flavor, Butterfinger Balls are the perfect make-ahead treat for your busy life. To prep these delightful bites in advance, you can mix the peanut butter and crushed Butterfinger candy together and store the mixture in an airtight container in the refrigerator for up to 3 days. When you’re ready to finish them, simply scoop and roll the mixture into balls, dip them in melted chocolate, and let them set. For optimal quality, ensure that the mixture is well sealed to prevent any moisture from affecting the texture. With this simple prep strategy, you’ll have scrumptious Butterfinger Balls ready to delight your family whenever you need a sweet treat!
Butterfinger Balls Recipe FAQs
How do I choose the best ingredients for Butterfinger Balls?
When making Butterfinger Balls, opt for high-quality peanut butter and chocolate. Creamy peanut butter works best for achieving a smooth texture, while using semi-sweet or milk chocolate chips can add a delightful sweetness. If you want a touch of nostalgia, consider using classic Butterfinger candy bars crushed into the mixture for an extra layer of flavor.
What’s the best way to store Butterfinger Balls?
Store your Butterfinger Balls in an airtight container at room temperature if you plan to enjoy them within a week. For longer storage, keep them in the fridge where they’ll last up to two weeks. Just make sure they’re wrapped or placed in a sealed container to prevent them from drying out or absorbing any other flavors from your fridge.
Can I freeze Butterfinger Balls?
Absolutely! Freezing is a great way to keep your Butterfinger Balls fresh. Simply place them on a baking sheet lined with parchment paper and freeze until firm (about 1-2 hours). Once frozen, transfer them to an airtight container or freezer bag, separating layers with parchment paper. They can be stored in the freezer for up to three months—just thaw them in the fridge for a few hours before enjoying!
What should I do if my mixture is too crumbly?
If your mixture ends up too crumbly and doesn’t hold together well, don’t fret! You can simply add more peanut butter—start with one tablespoon at a time until you achieve that perfect consistency. Additionally, chilling the mixture for about 30 minutes before rolling can help it firm up and make it easier to shape.
Are there any dietary considerations I should keep in mind?
If you’re looking for gluten-free options, make sure to use gluten-free chocolate chips and verify that your peanut butter is certified gluten-free as well. For those with nut allergies, consider substituting peanut butter with sunbutter or another seed-based spread. Lastly, if you need to reduce sugar intake, try using sugar-free chocolate chips and adjust the sweetness of the mixture as needed.
How long does it take to prepare Butterfinger Balls?
Preparing Butterfinger Balls typically takes around 30 minutes of active time, with an additional 30 minutes needed for chilling. After mixing all the ingredients together and rolling them into balls, refrigerate them until they’re firm enough to enjoy. The whole process is fairly simple and yields delicious results that everyone will love!
Butterfinger Balls
Ingredients
Method
- Crush the Butterfinger bars into fine crumbs using a food processor or by smashing in a zip-top bag.
- Mix the crushed Butterfinger with creamy peanut butter in a large bowl until fully combined.
- Scoop out tablespoon-sized portions and roll them into smooth balls.
- Chill the formed balls in the refrigerator for at least 30 minutes.
- Melt chocolate chips in a microwave-safe bowl, heating in 30-second intervals until smooth.
- Dip each chilled Butterfinger ball into the melted chocolate, ensuring it’s fully coated.
- Cool the chocolate-coated balls in the fridge for about 15 minutes until set.